
This article provides a comprehensive guide on repairing ductwork in crawl spaces.
It aims to assist individuals in assessing the damage, gathering the necessary tools and materials, and preparing their crawl space for repair.
Additionally, it offers guidance on identifying and fixing leaks and tears in the ductwork, sealing and insulating it for improved efficiency, testing the repaired ductwork for airflow and leakage, cleaning and maintaining the crawl space and HVAC system, as well as preventive measures to avoid future ductwork damage.
The information presented herein is intended to be knowledgeable, technical, precise, and prioritizes safety.
Assessing the Damage in Your Crawl Space
Assessing the damage in the crawl space involves conducting a thorough inspection of the ductwork to identify any visible signs of deterioration or disconnection. This process is crucial in determining the extent of the damage and evaluating the cost involved in repairing or replacing the affected ducts.
During the assessment, it is important to carefully examine all sections of the ductwork, including joints, seams, and connections. Look for any cracks, holes, or gaps that may have developed over time. These defects can lead to air leakage, reducing system efficiency and potentially allowing contaminants to enter the indoor environment.
In addition to visual inspection, it may be necessary to use specialized tools such as smoke pencils or infrared cameras to detect hidden leaks or insulation issues within the ductwork. These tools can provide valuable insights into areas that are not easily accessible or visible.
Once all visible damage has been identified and assessed, it is essential to evaluate its extent by considering factors such as airflow loss and potential impact on overall system performance. This information will help determine whether repairs are sufficient or if complete replacement is necessary.
Lastly, assessing the damage also involves evaluating the cost implications associated with repair or replacement options. Factors such as material costs, labor charges, and potential energy savings should be taken into consideration when making decisions about how best to address damaged ductwork in order to ensure safety and efficiency.
## Gathering the Necessary Tools and Materials
To effectively complete the task of drywall repair in a crawl space, it is essential to compile the required tools and materials for the repair project in the designated area. Safety precautions should be prioritized throughout the process to ensure a secure working environment.
1. Protective Gear: It is crucial to wear appropriate protective gear, such as gloves, safety glasses, and a dust mask, to prevent injury and minimize exposure to potentially harmful substances like dust and mold.
2. Tools: The following tools are commonly used for drywall repair in crawl spaces: a utility knife for cutting damaged sections of drywall, a putty knife for applying joint compound or spackle, sandpaper or a sanding block for smoothing rough edges, and a taping knife for applying tape during the mudding process.
3. Ladder: In some cases, accessing certain areas of the crawl space may require using a ladder. Ensure that the ladder is sturdy and stable before climbing it to avoid falls or accidents.
## Preparing Your Crawl Space for Ductwork Repair
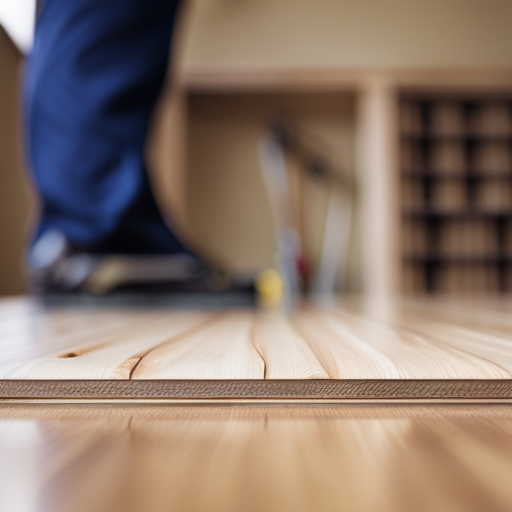
One important step in preparing for ductwork maintenance is ensuring that the designated area is free from any obstructions or debris. When it comes to repairing ductwork in a crawl space, proper preparation is crucial to ensure the safety and effectiveness of the repair process.
Before beginning any repair work, it is essential to thoroughly inspect and clean the crawl space. This involves removing any accumulated dirt, dust, or other debris that may have settled on the ducts or obstructed their airflow. Additionally, checking for any signs of mold or pest infestation is also important as these issues can further compromise the integrity and functionality of the ductwork.
The importance of preparing the crawl space cannot be overstated as neglecting this step can lead to subpar repairs and potential health hazards. Clogged or obstructed ducts not only reduce airflow efficiency but can also contribute to poor air quality by circulating pollutants and allergens throughout the living spaces. Furthermore, neglecting regular maintenance and repairs can result in increased energy consumption and higher utility bills.
## Identifying and Fixing Leaks and Tears in the Ductwork
Identifying and fixing leaks and tears in the ducts is an essential step in maintaining the efficiency and functionality of the HVAC system. Leaks or tears in the ductwork can lead to air loss, reduced airflow, decreased energy efficiency, and compromised indoor air quality. Repairing these issues promptly is crucial to prevent further damage and ensure optimal performance.
To address ductwork leaks or torn sections effectively, consider the following steps:
– Visual inspection: Thoroughly examine the entire length of the ductwork for any visible signs of leakage or tearing. Look for loose connections, gaps between joints, or holes in the material.
– Pressure testing: Utilize a pressure test kit to assess the extent of air leakage. This technique involves sealing off all vents except one and pressurizing the system with a blower door fan. By measuring airflow rates at various points, you can identify problem areas that require repair.
– Sealing methods: Depending on the severity of leaks or tears found during inspection, choose appropriate sealing techniques such as mastic sealant, foil tape, or aerosol-based sealants. Ensure proper application by following manufacturer instructions.
By addressing and fixing ductwork leaks promptly and effectively, you can enhance energy efficiency while improving indoor air quality and overall system performance.
Regular maintenance should include routine inspections to minimize potential future issues with your HVAC system’s ducts.
## Sealing and Insulating the Ductwork for Improved Efficiency
Sealing and insulating the ductwork is an effective method to enhance the efficiency of the HVAC system by minimizing air loss and improving airflow. Properly sealed ducts prevent conditioned air from escaping, reducing energy waste and ensuring that heated or cooled air reaches its intended destination. There are several sealing techniques that can be employed to achieve optimal results.
One common method is using mastic sealant, a thick adhesive material specifically designed for sealing duct joints and gaps. Mastic sealant provides an airtight bond that prevents leakage while remaining flexible over time. Another technique involves using metal-backed tape or foil tape to secure joints and seams in the ductwork. These tapes have excellent adhesion properties and are resistant to temperature changes, making them suitable for use in HVAC systems.
In addition to sealing, insulating the ductwork further improves energy efficiency by reducing heat transfer between the conditioned air inside the ducts and the surrounding environment. Insulation materials such as fiberglass or foam sleeves can be wrapped around the ducts to create a thermal barrier, preventing unwanted heat gain or loss.
Properly sealed and insulated ductwork not only improves energy efficiency but also enhances indoor comfort by ensuring consistent airflow throughout living spaces. By implementing these sealing techniques and adding insulation, homeowners can optimize their HVAC system’s performance while reducing energy consumption, ultimately leading to cost savings and a more sustainable home environment.
## Reconnecting and Securing the Ductwork Properly
Reconnecting and securing the ductwork properly is crucial for ensuring efficient airflow and preventing air leakage in an HVAC system. When repairing or replacing ductwork, it is important to follow proper procedures to ensure optimal performance and safety. The table below provides a summary of recommended practices for reconnecting and securing ductwork.
| Reconnecting Ductwork | Securing Ductwork |
|———————-|——————|
| Inspect all joints to ensure they are clean and free from debris. | Use metal screws or clamps to secure connections between duct sections. Avoid using tape as the sole means of connection. |
| Align the ends of the duct sections properly before connecting them. | Seal any gaps or leaks with mastic sealant or metal-backed tape to prevent air leakage. |
| Use foil-backed tape or mastic sealant to connect flexible ducts to rigid ones securely. | Support long runs of ductwork with hangers or straps at regular intervals to minimize sagging and potential damage over time. |
| Test the connections by applying positive pressure within the system and checking for any signs of air leakage. | Insulate exposed sections of ductwork, especially those located in unconditioned spaces such as crawl spaces, to prevent energy losses due to heat transfer.
## Testing the Repaired Ductwork for Airflow and Leakage
Testing the repaired ductwork for airflow and leakage is an essential step in ensuring the effectiveness and efficiency of the HVAC system. Proper testing methods and troubleshooting techniques can help identify any potential issues that may arise after repairing the ductwork.
One commonly used testing method is the use of a blower door test. This involves sealing off all openings in the house, except for one door, where a powerful fan is installed. By pressurizing or depressurizing the house, any leaks in the ductwork can be detected by measuring airflow with specialized equipment. This method allows for a comprehensive assessment of both airflow and leakage.
Another testing method involves using smoke pencils or thermal imaging cameras to identify areas where air may be escaping from the repaired ductwork. These tools can visually indicate any gaps or weak spots where air is leaking out.
Troubleshooting techniques also play a crucial role in identifying issues with repaired ductwork. These techniques involve inspecting connections, joints, and seals to ensure they are properly secured and free from any damage that could compromise airflow or cause leaks.
## Cleaning and Maintaining Your Crawl Space and HVAC System
Cleaning and maintaining the crawl space and HVAC system is essential for ensuring optimal performance, energy efficiency, and indoor air quality. Regular maintenance of these areas not only prolongs the lifespan of the system but also prevents potential health hazards caused by poor air circulation and buildup of pollutants.
One important aspect of crawl space maintenance is proper ventilation. Crawl spaces are prone to high humidity levels, which can lead to mold growth, wood rot, and structural damage. Installing a crawl space ventilation system helps mitigate these issues by allowing fresh air to circulate and reducing moisture levels.
Regular cleaning of the crawl space is also crucial. Dust, debris, pests, and other contaminants can accumulate in this area over time. These substances can infiltrate the HVAC system, compromising its efficiency and negatively impacting indoor air quality. Cleaning involves removing any accumulated debris or pests from the crawl space, as well as checking for any signs of water leaks or damage.
Maintaining the HVAC system itself is equally important. This includes regular filter changes to ensure proper airflow and prevent dust accumulation within the system. Additionally, scheduling professional inspections at least once a year allows for early detection of any potential issues such as leaks or malfunctioning components.
## Preventive Measures to Avoid Future Ductwork Damage
To prevent future damage to the ventilation system, homeowners should prioritize regular inspections and maintenance. Implementing preventive measures can help avoid costly repairs and ensure the efficient functioning of the ductwork in the crawl space.
One important preventive measure is to schedule regular professional inspections by HVAC technicians who are trained in identifying potential issues with the ductwork. These professionals have specialized tools and knowledge to thoroughly inspect the system and identify any leaks, blockages, or signs of wear and tear. Addressing these issues promptly can prevent further damage to the ductwork and improve indoor air quality.
Another advantage of seeking professional assistance is that they can provide thorough cleaning services for the ductwork. Over time, dust, debris, mold, and allergens can accumulate in the ducts which can impact air quality and cause health problems. Professional cleaners have access to high-powered equipment that can effectively remove these contaminants from the system.
In addition to regular inspections and cleanings, homeowners should also consider installing insulation on their ducts. Insulation helps maintain proper temperature control within the crawl space while preventing condensation buildup that could lead to moisture damage.
Overall, taking preventive measures such as regular inspections, cleanings, and insulation installations with professional assistance is crucial in avoiding future damage to your home’s ventilation system. By prioritizing these maintenance tasks, homeowners can ensure a safe and healthy living environment for themselves and their families.
## When to Call in a Professional for Ductwork Repairs
Seeking professional assistance is advisable when homeowners notice any signs of damage or inefficiency in their home’s ventilation system. While some individuals may be inclined to attempt DIY ductwork repairs, it is important to recognize the potential risks and limitations associated with such endeavors. Ductwork damage can manifest in several ways, including visible leaks or gaps, unusual noises, inconsistent airflow, and increased energy bills. These signs indicate a compromised system that requires immediate attention.
Attempting DIY repairs without proper knowledge and expertise can exacerbate the problem or even create new issues. Professionals possess the necessary training and experience to accurately diagnose ductwork problems and implement appropriate solutions. They have access to specialized tools and materials required for efficient repairs.
Moreover, engaging professional assistance ensures compliance with safety standards and regulations. Mishandling ductwork repairs can compromise indoor air quality by introducing contaminants into the living space or by failing to adequately seal the ducts after repair. Professionals are equipped with the knowledge of industry best practices to mitigate these risks effectively.
## Frequently Asked Questions
### Can I use duct tape to repair leaks in my ductwork?
Using duct tape as an alternative ductwork repair method may seem convenient, but it is not recommended. Duct tape deteriorates over time, leading to reoccurring leaks. This can compromise the efficiency and safety of the HVAC system.
### How long does it typically take to repair ductwork in a crawl space?
Minimizing repair time for ductwork in a crawl space can be achieved by conducting a thorough inspection, accurately identifying the issues, and using efficient repair techniques. Common mistakes to avoid include inadequate sealing and improper insulation, which can compromise safety and efficiency.
### Should I clean my crawl space before repairing the ductwork?
Cleaning the crawl space before repairing the ductwork can provide several benefits. It helps remove debris, mold, and pests that may affect air quality. However, the cost of cleaning should be considered in relation to the overall repair budget.
### What type of insulation is best for ductwork in a crawl space?
The best materials for insulating ductwork in a crawl space include rigid foam insulation or fiberglass insulation with a vapor barrier. Both options are cost effective and provide adequate thermal protection, ensuring safety in the crawl space environment.
### How often should I schedule maintenance for my crawl space and HVAC system?
Regular scheduling maintenance for both the crawl space and HVAC system is essential. It ensures optimal performance, early detection of issues, prevention of costly repairs, improved energy efficiency, enhanced indoor air quality, and overall safety for occupants.
## Conclusion
In conclusion, repairing ductwork in a crawl space requires careful assessment of the damage, gathering the necessary tools and materials, and preparing the space for repair.
Identifying and fixing leaks and tears in the ductwork is crucial, followed by sealing and insulating for improved efficiency. Testing the repaired ductwork ensures proper airflow and minimal leakage.
Regular cleaning and maintenance of both the crawl space and HVAC system are essential for long-term functionality. Finally, taking preventive measures can help avoid future ductwork damage. If needed, it is advisable to seek professional assistance for complex repairs.


Outstanding feature
Insightful piece