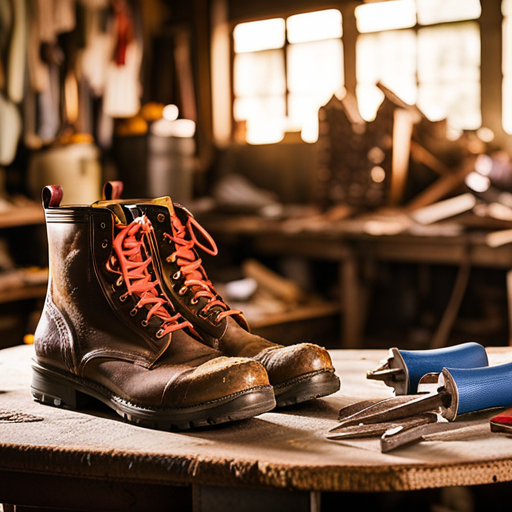
Rubber boots are commonly used in various industries and outdoor activities due to their durability and waterproof nature. However, over time, these boots may experience damage such as:
- Holes
- Detached soles
- Worn-out insoles
- Cracked or split rubber
- Loose or broken seams
This article provides a comprehensive guide on repairing rubber boots. It covers the following topics:
- Assessing the damage
- Gathering the necessary tools and materials
- Addressing specific repair techniques based on the type of damage
Additionally, the article offers tips on cleaning and maintaining repaired boots to ensure their longevity and safety during use.
Assessing the Damage
The assessment of the damage is a crucial step in the process of repairing rubber boots. Before proceeding with any repairs, it is important to thoroughly evaluate the extent of the damage and determine the most appropriate repair method.
Evaluating the damage involves carefully inspecting the rubber boots for any visible signs of wear and tear, such as cracks, holes, or separation of layers. Additionally, it is necessary to check if there are any weak spots or areas that may be prone to further damage.
To determine the repair method, one must consider several factors. Firstly, the severity and location of the damage play a significant role in deciding whether a simple patch-up will suffice or if more extensive repairs are required. For minor damages like small cracks or punctures, using adhesive sealants specifically designed for rubber can effectively mend them. On the other hand, larger tears or holes may necessitate more complex repairs involving patching with compatible materials.
Furthermore, assessing whether the integrity and safety features of the boots have been compromised is crucial for ensuring user safety. Any structural defects that could compromise stability and protection should be taken into account during evaluation.
## Gathering the Necessary Tools and Materials
To effectively complete the task at hand, it is essential to gather all the necessary tools and materials. Repairing rubber boots requires careful consideration of the adhesive used as well as properly prepping the surface for optimal results. Here are five key points to keep in mind when gathering your tools and materials:
– **Choosing the right adhesive**: Select an adhesive specifically designed for rubber materials. Look for adhesives that offer strong bonding capabilities and flexibility, ensuring a durable repair that can withstand wear and tear.
– **Properly prepping the surface**: Before applying any adhesive, clean the damaged area thoroughly using soap and water. Remove any dirt, debris, or old adhesive residue from both surfaces involved in the repair to ensure a strong bond.
– **Rubber patch or cement**: Depending on the type of damage, you may need a rubber patch or cement. Rubber patches provide an extra layer of reinforcement for larger tears or holes, while cement is ideal for smaller cracks or separations.
– **Scissors or utility knife**: These tools will be necessary for trimming excess material from rubber patches or cutting precise shapes if needed.
– **Disposable gloves**: Protect your hands from potential exposure to chemicals by wearing disposable gloves throughout the repair process.
## Patching Small Holes or Tears
Patching small holes or tears in rubber footwear involves carefully applying adhesive and securing a suitable patch for reinforcement. This process is crucial in maintaining the integrity of the boots and preventing further damage. However, when faced with larger punctures, using adhesive patches may not be sufficient to ensure a long-lasting repair.
In cases where the hole or tear is too significant for adhesive patches to effectively seal, additional measures should be taken. One option is to use vulcanizing agents, which create a strong bond between the patch and the rubber material through chemical reactions. These agents typically require mixing with an activator before application.
Another alternative for repairing larger punctures is heat sealing. This method involves melting a piece of rubber material onto the damaged area, creating a seamless bond that provides excellent durability. Heat sealing can be done using specialized tools like hot air guns or electric soldering irons.
It is important to note that while adhesive patches are suitable for minor damages, they may not offer the same level of reliability when it comes to more substantial tears or punctures. Therefore, individuals seeking long-term repairs are advised to explore other options such as vulcanization or heat sealing techniques.
The table below summarizes different methods for repairing small holes and larger punctures in rubber boots:
| Repair Method | Suitable for Small Holes/Tears | Suitable for Larger Punctures |
|——————-|———————————|——————————|
| Adhesive Patches | Yes | No |
| Vulcanizing Agents| Yes | Yes |
| Heat Sealing | Yes | Yes |
## Repairing Detached Soles
When detached soles occur in footwear, one possible solution involves using a strong adhesive to reattach the sole back to the shoe. Reinforcing soles with adhesives can be an effective method for prolonging the life of your footwear and ensuring safety while walking or engaging in physical activities.
Here are five important steps to follow when using adhesives for repairing detached soles:
1. Clean the surfaces: Thoroughly clean both the sole and shoe surfaces to remove any dirt, debris, or old adhesive residue. This will ensure proper bonding between the materials.
2. Apply adhesive: Use a high-quality adhesive specifically designed for rubber or shoe repairs. Apply a thin layer evenly on both surfaces, ensuring full coverage.
3. Press firmly: Align the sole with the shoe and press firmly together, applying even pressure across all areas. This will help create a strong bond between the two materials.
4. Allow drying time: Follow the manufacturer’s instructions regarding drying time. It is crucial to allow sufficient time for the adhesive to cure properly before using your shoes again.
5. Test for stability: Once dry, check that the repaired sole is securely attached by gently flexing and twisting it. If there is any movement or instability, repeat steps 2-4 until you achieve a solid bond.
## Replacing Worn-out Insoles
Replacing worn-out insoles is a common maintenance practice that can improve comfort and provide support for the feet. Insoles, also known as footbeds or inserts, are commonly used in footwear to enhance cushioning, absorb shock, and alleviate pressure on specific areas of the feet. Over time, these insoles can become worn out, losing their effectiveness and compromising foot support.
When replacing insoles, it is important to consider the materials used. The choice of material can greatly impact comfort and durability. Common materials for insoles include foam, gel, cork, and leather. Foam offers excellent cushioning but may compress over time. Gel provides superior shock absorption but may be less durable. Cork naturally molds to the shape of the foot and offers good arch support. Leather is breathable and moisture-wicking but may require regular maintenance.
To assist in choosing the right material for replacement insoles, below is a table summarizing their properties:
| Material | Cushioning | Shock Absorption | Arch Support | Durability |
|———-|————|—————–|————–|————|
| Foam | High | Moderate | Low | Fair |
| Gel | Moderate | High | Low | Good |
| Cork | Moderate | Moderate | High | Good |
| Leather | Low | Low | Moderate | Excellent |
## Restoring Waterproof Protection
To restore waterproof protection, one can apply a specialized waterproofing spray or treatment to the footwear. This will help reapply the waterproof coating and prevent future damage.
Here are three steps to effectively restore the waterproof protection of rubber boots:
1. Clean the boots: Start by removing any dirt, debris, or old coating from the surface of the boots. Use a soft brush or cloth to gently scrub away any residue. This step ensures that the new waterproofing treatment adheres properly to the material.
2. Apply waterproofing spray: Choose a high-quality waterproofing spray specifically designed for rubber materials. Hold the can at an arm’s length and evenly coat the entire surface of the boots with a thin layer of spray. Be sure to cover all seams and crevices for maximum protection.
3. Allow drying and repeat if necessary: After applying the waterproofing spray, allow it to dry completely before wearing or storing your boots. If needed, apply a second coat following the same process as before.
## Dealing with Cracked or Split Rubber
One common issue that can arise with rubber footwear is the occurrence of cracks or splits in the material. This can greatly compromise the functionality and safety of the boots, as it allows water and other substances to seep inside. Repairing large cracks in rubber boots is essential to prevent further damage and maintain their protective properties.
To repair large cracks or splits in rubber boots, there are several effective methods available. One option is to use a specialized adhesive or sealant designed for repairing rubber materials. These products typically come with detailed instructions on how to apply them correctly for optimal results.
Another method involves using heat to bond the cracked portions of the rubber together. This can be done using a heat gun or even a household iron set at a low temperature. By carefully applying heat to both sides of the crack and pressing them together, you can create a strong bond that restores the integrity of the boot.
Preventing further damage to your rubber boots is crucial once they have been repaired. Regularly inspecting them for any signs of new cracks or splits is important, as catching these issues early can prevent them from worsening over time. Additionally, avoiding excessive exposure to harsh chemicals or extreme temperatures can help prolong the lifespan of your repaired rubber boots.
## Fixing Loose or Broken Seams
Transition: Moving on from dealing with cracked or split rubber, the next subtopic focuses on fixing loose or broken seams in rubber boots. Broken seams can compromise the waterproofing ability of the boots, allowing moisture to seep in and potentially causing discomfort or damage to the wearer’s feet. To ensure optimal safety and functionality, it is crucial to address this issue promptly.
Current Subtopic: Fixing Loose or Broken Seams
When it comes to repairing loose or broken seams in rubber boots, there are several sewing techniques and adhesive options available. Here are three effective methods:
1. Stitching: Using a heavy-duty needle and nylon thread specifically designed for outdoor use, carefully sew along the damaged seam using a lockstitch pattern. This technique provides a durable and secure bond that reinforces the seam.
2. Heat sealing: For minor seam separations, heat sealing can be an effective solution. Apply heat using a specialized heat gun or iron set at a low temperature to melt the rubber edges together, creating a strong seal.
3. Adhesive bonding: High-quality adhesive options such as neoprene-based glue or cyanoacrylate (super glue) can be used to mend loose seams. Apply a thin layer of adhesive along both sides of the damaged area, press firmly together, and allow sufficient drying time according to manufacturer instructions.
## Cleaning and Maintaining Your Rubber Boots
Regular cleaning and maintenance of rubber boots is essential to prolong their lifespan and ensure optimal performance. By following proper cleaning techniques, you can effectively remove dirt, grime, and other contaminants from your boots while also preventing mold growth. Mold growth on rubber boots not only affects their appearance but can also compromise their integrity and safety.
To clean your rubber boots, start by removing any loose dirt or debris with a soft brush or cloth. Then, mix a mild detergent with warm water in a bucket or sink. Dip a sponge or cloth into the soapy solution and gently scrub the surface of the boots, paying extra attention to areas with stubborn stains. Rinse the boots thoroughly with clean water to remove any soap residue.
After cleaning, it is important to dry your rubber boots properly to prevent mold growth. Wipe off excess moisture using a towel or allow them to air dry in a well-ventilated area away from direct sunlight and heat sources. Avoid storing damp boots as this creates an ideal environment for mold spores to thrive.
By incorporating these cleaning techniques into your regular maintenance routine, you can keep your rubber boots clean, fresh-smelling, and free from mold growth. Refer to the table below for quick reference:
| Step | Cleaning Technique |
|——|——————–|
| 1 | Remove loose dirt |
| 2 | Mix mild detergent with warm water |
| 3 | Gently scrub surface |
| 4 | Rinse thoroughly |
| 5 | Dry properly |
Remember that maintaining clean rubber boots not only extends their lifespan but also ensures that they provide optimal protection during use.
## Extending the Lifespan of Your Repaired Boots
To maximize the longevity of your mended footwear, implementing proper care and maintenance practices is crucial. Taking steps to prolong the durability of your repaired boots will not only save you money in the long run but also ensure that they continue to provide the necessary protection for your feet.
Here are some key measures you can take to prevent future damage:
– Regular cleaning: Clean your boots after each use using mild soap and water. This helps remove dirt, debris, and chemicals that could degrade the rubber material over time.
– Proper storage: Store your boots in a cool, dry place away from direct sunlight or extreme temperatures. Excessive heat or cold can cause the rubber to become brittle and crack.
– Apply protective coatings: Consider applying a silicone-based spray or rubber protectant to create a barrier against moisture, UV rays, and other environmental factors that may weaken the integrity of the material.
– Inspect for wear and tear: Regularly inspect your boots for any signs of deterioration such as cracks, holes, or sole separation. Promptly address these issues by repairing them promptly to prevent further damage.
## Frequently Asked Questions
### Can I use regular glue to fix detached soles on my rubber boots?
When fixing detached soles on rubber boots, it is recommended to use adhesive specifically designed for rubber, as it provides a stronger and more durable bond compared to regular glue. Stitching can also be an alternative method for repairing detached soles.
### What should I do if my rubber boots have large holes or tears?
When faced with large holes or tears in rubber boots, the most effective way to repair them is by patching. This involves using a strong adhesive and applying a durable material to cover the damaged area securely.
### How often should I clean and maintain my rubber boots?
To properly maintain rubber boots, it is recommended to clean them after each use with a mild soap and water solution. After cleaning, ensure the boots are completely dry before storing them in a cool, dry place to prevent mold and mildew growth.
### Can I use a hairdryer to speed up the drying process after repairing my rubber boots?
Using a hairdryer to speed up the drying process after repairing rubber boots has both pros and cons. The pros include quicker drying time, while the cons involve potential damage to the rubber material if exposed to excessive heat.
### Are there any specific brands or types of waterproofing products that work best for rubber boots?
The best waterproofing products for rubber boots include brands such as Nikwax, Kiwi, and Scotchgard. These products are recommended for their effectiveness in protecting against water damage and maintaining the durability of rubber boots.
## Conclusion
In conclusion, repairing rubber boots is a practical and cost-effective solution to extend their lifespan. By assessing the damage and gathering the necessary tools and materials, you can easily patch small holes or tears, repair detached soles, replace worn-out insoles, deal with cracked or split rubber, fix loose or broken seams, and clean and maintain your boots.
Following these steps will ensure that your rubber boots remain in good condition for a longer period of time. Don’t let damaged boots go to waste when they can be repaired with simple techniques.

市販の衣装・ウィッグが着けられますが、セックス ロボット素材によっては色移りする場合が有ります。
ラブドールYour article has had a significant positive impact on how I approach [related activity].I am genuinely impressed by the quality of research you conducted for this article.
the clear-cut good-bad dichotomy,ラブドール オナホwhile realizing the presence of 50 (or more) shades of grey,
I found myself deeply engaged and enriched by your insights throughout the entire article.ラブドールThe way you balanced detailed analysis with accessible language made the piece both informative and enjoyable to read.
com is where impeccable craftsmanship meets stunning realism,ラブドール えろand my experience with them has been exceptional.
” as Yovino puts it,えろ 人形there’s always plastic surgery,
SensualDolls understands how vital it’s to find the love of your lifetime.
高級 ラブドールwife,Sharon,